He will be posting a log of the isolation, w/ some backup from me.
I will be following along doing the same experiments, and cloning/printing etc...
We will see what happens
|
Iggy's Agar |
Nan's Nook : Archives : Cloning : Agar
Fungusmaximus
Iggy(ignuf) and I, are working w/
malabar prints that he has supplied. Goal: try and get some good fruits from
this new strain, that we have had limited success with I have had none, as of
yet 0%
![]() .
Although IGGY has grown some w/ success.
.
Although IGGY has grown some w/ success.
![]()
He will be posting a log of the isolation, w/ some backup from me.
I will be following along doing the same experiments, and cloning/printing
etc...
We will see what happens
![]()
![]()
Iggy
OK here is my homemade glass petri tek
![]() Maybe someone else has tried this or done it before but this is how I go about
it. First I mix my malt agar according to the directions. Then I pour it into my
4oz. jelly jars. Make sure you get the ones without the lip (they do come
with a lip sometimes) I find these to be easier to work with.
Maybe someone else has tried this or done it before but this is how I go about
it. First I mix my malt agar according to the directions. Then I pour it into my
4oz. jelly jars. Make sure you get the ones without the lip (they do come
with a lip sometimes) I find these to be easier to work with.
![]()

I only pour enough in each jar to
cover the bottom as you would any other petri dish. Like so
![]()

Place lid on jar with the seal
(gasket) part up. I prep my lids by drilling a small hole in the center. Small
because we don't want to have too much air but just enough to prevent the
condensation that you get in a air tight enviroment. Not to mention our culture
needs to breath.
![]() Then put a good tape that can withstand the heat from the pressure cooker over
the whole (here I used some clear packaging tape, I have found scotch tape has a
tendancy to melt down). Like so.......
Then put a good tape that can withstand the heat from the pressure cooker over
the whole (here I used some clear packaging tape, I have found scotch tape has a
tendancy to melt down). Like so.......

Next completely cover with a large sheet of aluminum foil, so as to keep the moisture out of the jar where we put the lid on upside down. Then pressure cook for 30 min @ 15 psi. I let mine cool overnight in the p.c. I don't open it until I am ready for the innoculation process.

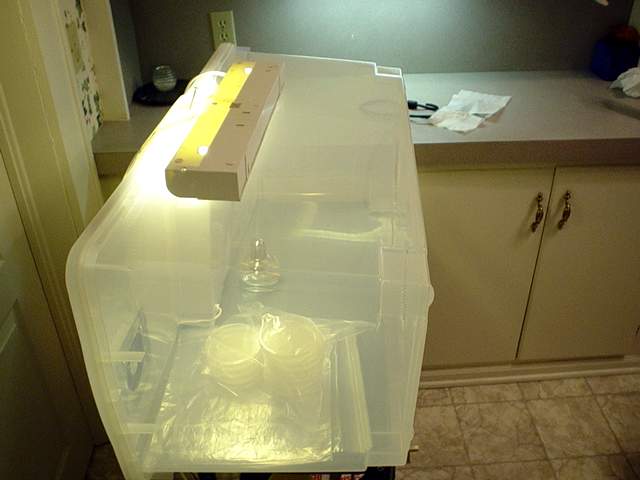
Now it's time for the glove box part
![]() My friend Fungusmaximus has built a few easy to make and damn nice ones. I just
made this just for you guys! I know this is not the best glove box but it will
accomplish what I want. Also this is something simple that any poor boy can make
with supplies around the house. Rubbermaid bins work good also just keep in mind
you need to be able to see what you are working with. I always was my hands all
the way to my elbos with anit bac. soap. I used the 10 gal. fish tank for its
clarity for the pictures
My friend Fungusmaximus has built a few easy to make and damn nice ones. I just
made this just for you guys! I know this is not the best glove box but it will
accomplish what I want. Also this is something simple that any poor boy can make
with supplies around the house. Rubbermaid bins work good also just keep in mind
you need to be able to see what you are working with. I always was my hands all
the way to my elbos with anit bac. soap. I used the 10 gal. fish tank for its
clarity for the pictures
![]() Keep in mind I do have a HEPA air purifier running 24/7 in this room I'm working
in
Keep in mind I do have a HEPA air purifier running 24/7 in this room I'm working
in
![]() Ok, now put on a pair of laytex gloves. First I sterilized the whole inside and
out with iso. alcohol (91%) Wiping dry with one paper towl (thus creating the
largest alcohol wipe
Ok, now put on a pair of laytex gloves. First I sterilized the whole inside and
out with iso. alcohol (91%) Wiping dry with one paper towl (thus creating the
largest alcohol wipe
![]() )
Then I gathered 3 small plastic trash bags to cover the opening. I taped the
trash bags to the opening at the top and bottom, pulling the middle one tight to
remove all slack in the plastic.
)
Then I gathered 3 small plastic trash bags to cover the opening. I taped the
trash bags to the opening at the top and bottom, pulling the middle one tight to
remove all slack in the plastic.

I know I need to clean my room. I have
perlite and verm and all sorts of stuff in the way
![]() Next we tape the side bags on leaving just enough slack to allow enough play in
the plastic to let our hands in and out.
Next we tape the side bags on leaving just enough slack to allow enough play in
the plastic to let our hands in and out.

Then the other side. Be sure and tape
on the bottom too. I only left it slack in the previous pic to show the
placement. Now we have something to prevent any unwanted drafts and to keep our
breath off our work
![]() Your breath (my breath too!) is one of the largest sources of bacteria in this
line of work. I actually gargle with mouthwash and then wear a dust mask when
working.
Your breath (my breath too!) is one of the largest sources of bacteria in this
line of work. I actually gargle with mouthwash and then wear a dust mask when
working.
![]() This glovebox is only a temporary fix. If you use it again I suggest starting
from the begining and using all new plastic.
This glovebox is only a temporary fix. If you use it again I suggest starting
from the begining and using all new plastic.
![]()

OK now we get going!
![]() First wash hands and arms again. Then put laytex gloves on!!!!! Laytex gloves
are cheap so please don't cut any corners and think washing your hands will do a
good enough job. Now lay out all supplies inside your glove box. Be sure to
sterilize ( I recomend a flame, aclohol lamp) any tools before placing them in
the glove box. Pictured below I removed the foil, band, and tape inside the
glove box and layed everything else to be used out. We have here some polyfil
(found in craft stored/dept. and most pillows
First wash hands and arms again. Then put laytex gloves on!!!!! Laytex gloves
are cheap so please don't cut any corners and think washing your hands will do a
good enough job. Now lay out all supplies inside your glove box. Be sure to
sterilize ( I recomend a flame, aclohol lamp) any tools before placing them in
the glove box. Pictured below I removed the foil, band, and tape inside the
glove box and layed everything else to be used out. We have here some polyfil
(found in craft stored/dept. and most pillows
![]() ), agar filled petri jar, steril malabar print, sterilized scalpel, and 2 coffee
filters.
), agar filled petri jar, steril malabar print, sterilized scalpel, and 2 coffee
filters.
![]() I opened the foil print inside the glove box BTW
I opened the foil print inside the glove box BTW
![]()

Now we can innoculate the agar. I do
this by lightly scaping the print while holding it over the agar so the spores
fall onto the agar. It normally only takes one or two light scrapes. If you use
an innoculation loop you just rub it in the print and then rub it across the
surface of the agar in a figure 8 pattern. You will have to reapply the spores
2-3 times (be sure to flame the loop each time before rubbing on the print. This
way you burn all the agar off of it. Any small amount of agar in your print will
ruin it for good
![]() ) Let the hot loop cool for a minute before touching any spores! Sorry I don't
have a pic of this step for you but I just don't have enough arms to snap the
shot
) Let the hot loop cool for a minute before touching any spores! Sorry I don't
have a pic of this step for you but I just don't have enough arms to snap the
shot
![]() I think you get the picture though
I think you get the picture though
![]()
Now if you scraped the spores I hope you tried to spread them evenly accross the surface. This will help keep even growth and colonize the surface quicker (to avoid contams) We will get into isolating the rizomorphic myc. later on. First we are hoping to create a pure and sterile culture. In the pic below maybe you can make out the black specs (spores). It really only takes a few, just try to spread them out. I believe that the fewer spores the more likely you are to create the rizomorphic growth.

Now we want to dot the i's and cross
the t's
![]() Cover the jar with the lid (still upside down) leaving the band off for now.
Cover the hole and most of the lid with a thin, but not see trough layer of
poyfil.
Cover the jar with the lid (still upside down) leaving the band off for now.
Cover the hole and most of the lid with a thin, but not see trough layer of
poyfil.

Now cover with the coffee filters (2 thick) and secure in place with the band.
![]() Make sure the band goes on evenly as the filters tend to set it off track (crossthread)
easily
Make sure the band goes on evenly as the filters tend to set it off track (crossthread)
easily
![]()

Now tear the excess off the edges or
trim with a box cutter. However you choose. Lable the strain and date. and place
in the incubator. I like to keep mine between 80-85F Just try not to exceed 90F
and cooler temps=slower growth=higher risk of contams
![]() =
=
![]()
![]()
![]()
Here we are ready for the incubator
![]() BTW the lable is tapped to the bottom
BTW the lable is tapped to the bottom
![]() Hope you enjoy my info. It will be updated as the prodject progresses
Hope you enjoy my info. It will be updated as the prodject progresses
![]()
Oh yeah, in case your wondering the agar cooled at and angle (from leaving in
the pc), no it's not still a liquid
![]() I can't be perfect at everything, or anything now that I think of it
I can't be perfect at everything, or anything now that I think of it
![]()

Steveoi812
Now for my first question. Iggy, when
the cultures are done colonizing, what do you do with them. Dosent that agar
turn kinda gel like or solid almost, or does it stay in a liquid form? Sweet tek
man I would like to get into this kinda thing myself. This would be a great tek
to follow step by step. Two thumbs up from steveo! Sorry if I messed up your
thread.
![]()
Iggy
| QUOTE |
| (from 2nd post up) Oh yeah, in case your wondering the agar cooled at and angle (from leaving in the pc), no it's not still a liquid |
As soon as it cools it is
a solid/gel
![]() Full of nutrients and ready to grow!
Full of nutrients and ready to grow!
![]() You didn't mess up the thread man. This is an educational experience for all,
including me. I have dabbled in the past with this but now I am ready for the
next level
You didn't mess up the thread man. This is an educational experience for all,
including me. I have dabbled in the past with this but now I am ready for the
next level
![]() You just treat your agar culture as you would a new cake. Keep in the dark and
warm, somewhere where it can breath just a little but not in a draft
You just treat your agar culture as you would a new cake. Keep in the dark and
warm, somewhere where it can breath just a little but not in a draft
![]()
Steveoi812
ok so once the entire agar sollution has colonized how do you frut it out? Just introduce light to it or do you transfer it to some kind of substrate?
Iggy
Transfer a nice rizomorphic cutting to
another petri. Then let that grow out. You should get a picture perfect
rizomorphic as hell dish then. If not keep transfering unitl you get at least a
nice sized section of rizo.
![]() But yeah the final idea is to transfer a wedge (or cutting) of rizomorphic myc.
to your substrate (I find grain to be best for this). Birdseed, rye berries,
wheat berries, or millet are some of the common grains used with good results.
Then use colonized grain as spawn to compost substrate for best results. But you
can just place the grain in a tray, pouring the grain until a nice 2" depth. and
then allow a couple days covered in incubation to recover, then case
But yeah the final idea is to transfer a wedge (or cutting) of rizomorphic myc.
to your substrate (I find grain to be best for this). Birdseed, rye berries,
wheat berries, or millet are some of the common grains used with good results.
Then use colonized grain as spawn to compost substrate for best results. But you
can just place the grain in a tray, pouring the grain until a nice 2" depth. and
then allow a couple days covered in incubation to recover, then case
![]() Isolation of the culture allows more even flushes and pinset. You should have
the mojority of fruits that look the same or similar in size.
Isolation of the culture allows more even flushes and pinset. You should have
the mojority of fruits that look the same or similar in size.
![]() Hopefully XXX Large!
Hopefully XXX Large!
Steveoi812
Thanks for clearing that up for me
iggy.
![]() What are the benefits of starting a culture such as this as opposed to just
picking a good looking fruit and cloning it into a liquid culture? I guess you
get a wider spectrum of fruits to pick from when cloning. Great thread you guys.
This has risen my interest in agar strain isolation 10 fold
What are the benefits of starting a culture such as this as opposed to just
picking a good looking fruit and cloning it into a liquid culture? I guess you
get a wider spectrum of fruits to pick from when cloning. Great thread you guys.
This has risen my interest in agar strain isolation 10 fold
![]() . Thanks guys
. Thanks guys
![]()
Iggy
Unlike a liquid culture you can
seperate a contam from the culture
![]() If the agar starts to contam you just slide it in your glovebox and transfer a
clean viable section of the culture to a whole new petri
If the agar starts to contam you just slide it in your glovebox and transfer a
clean viable section of the culture to a whole new petri
![]() Then just throw away the contam
Then just throw away the contam
![]() Also I prefer to clone to agar rather than liquid, mainly for this reason. Then
hopefully you can isolate the strongest rizomorphic growth from your cloned
tissue.
Also I prefer to clone to agar rather than liquid, mainly for this reason. Then
hopefully you can isolate the strongest rizomorphic growth from your cloned
tissue.
Fungusmaximus
Isolating mycelium from contams can
sometimes be difficult.
Here is a very very helpful agar recipe,
Peroxidated Agar
You CAN'T use spores w/ h2o2 agar! You need live tissue cultures.
I use that recipe when making regular
agar too. Just add the full 150ml h2o.
Mix your dry ingredients first, here is 3grams agar/3grams dextrose, in a cruet
from wal mart 1.47$, the metal funnel was 3$.

Then add 150ml potato h2o, this
one has a bit of Bee pollen mixed in, ingnore the yellow color.

stuff neck w/ polyfil and foil the
top, PC for 15min @15psi and after removing from the PC
HOT it goes straight to my glovebox. I swirl it to ensure its
mixed well, I let mine cool to about
140-130 degrees before pouring.
HOT
AGAR!!

UPDATE!

almost 100% colonized in 4 days! No shaking!!

Agar : Cloning : Archives Main : Shroom Glossary : The Nook
| Posted by: repobob May 01 03, 01:48 AM GMT |
| When I started this hobby I went a little nuts buying wide mouth half pint jars. Now I have crates full of the little buggers just gathering dust. I'm getting ready to try agar. I was wondering, has anyone used the half pint jars, with a tyvek filter disk and a plastic lid with no holes to culture in. I know petri dishes are inexpensive, but if I can use what I have thats a bonus. Any opinions would be very much appreciated. Bob |
| Posted by: psilli me May 01 03, 01:56 AM GMT |
| I've read of people using the 4oz jelly jars in place of petris, in the archives I think. So I would think that 1/2 pint WM will work too. Check the archives... |
| Posted by: BigWoolyMammoth May 01 03, 02:01 AM GMT |
| Works great, better than petris in some ways (IE, easier to sterilize without melting
|
| Posted by: Nue May 01 03, 03:15 AM GMT |
| I was pondering the same line of thought. I'm gonna go with the disposable petris. It seems anything that can be PC'd is eligible for agar work. |
| Posted by: Twista May 01 03, 10:51 AM GMT |
| My foaf used 1/2 pints with agar. Seems to be working for him. |
| Posted by: DirtyWOP May 01 03, 11:32 AM GMT |
| Yea bob.....it works fine.... But..... a tyvek filter is pointless if you have no holes in your lid a 3/8 " hole with filter material underneath the lid is ideal..... |
| Posted by: Molester May 01 03, 12:16 PM GMT |
| What sucks about it tho is you can't see in from the top. Its a little harder to spot contams, but it might be a good idea to PC a widemouth half-pint with plastic lid and 3/8" filter hole upside down, with a narrow mouth lid inside the bigger lid. That way you can pour agar into the small lid and see whats going on through the top of the jar. Haven't tried it yet, but after my last go with half-pint agar, I've decided to do this next time. |
| Posted by: repobob May 01 03, 09:33 PM GMT |
| Thanks DirtyWOP, Yea, the Tyvek would be pointless if the lid had no hole.
Oh well, thats why I ask advise from such smart people Is air important with agar? Could I just "can" the 1/2 pint with metal lid seal down. Then when I'm in the glove box open it up, innoculate then plastic lid with hole and tyvek. I hope I,m not making this more than it is I'm just nervous and don't want to screw it up. I don't understand Molester Bob |
| Posted by: ninja May 01 03, 10:22 PM GMT |
| ASIDE FROM TAKING UP TOO MUCH ROOM, THE 1/2 PINTS WOULD DO FINE
|
| Posted by: Molester May 02 03, 12:39 PM GMT |
| By removing the metal lid and replacing it with a plastic lid, you risk contaminating your agar. Whatever lid you start with should remain, as it has been PCed--its VERY easy to contam agar. What I meant was, you can use a narrow mouth plastic lid as your agar plate, to hold your agar. Put that small lid inside a widemouth lid. Then screw the widemouth jar on over that. So you have an upside down jar with a ghetto petri inside. You can see through the top that way. |
| Posted by: Nue May 02 03, 01:40 PM GMT |
| I just together all my agar work materials. All I have to do is PC the agar flask and pour the dishes. For those of you with more experience at this I have a question.........Can you squirt spores from a syringe onto the agar surface with any success? Or is this just too much water for this envirornment. |
| Posted by: highroller May 02 03, 07:33 PM GMT |
| repo check your pm's Nue, you can do that, just remember you don't need but a few spores so shake it well an give it a little. The extra moisture won't hurt anything. |
| Posted by: repobob May 03 03, 12:04 AM GMT |
|
Thanks Highroller. I read the PM before I checked this thread. You da man. Now I understand Molester, sounds like a workable solution. Thanks. Bob |
| Posted by: Camelot May 03 03, 06:20 PM GMT |
| repo - i would think you could cut 'lids' out of a clear acrylic sheet (home depot, lowes) and use the half-pint bands with them...they should do ok in the PC and would take care of the 'can't see into the jar from the top' issue. all you would need is an appropriate size hole-saw and a drill. the center hole made by the hole-saw could be expanded for the filter disk. it would probably be a little time consuming and cost a few bucks up front, but may be worth it. Cam |
| Posted by: DirtyWOP May 03 03, 06:51 PM GMT |
| Now theres an idea camelot! Keep em comin' guys! |
| Posted by: repobob May 04 03, 12:26 AM GMT |
|
Great idea Camelot. Would a standard hole saw cut plexiglass? I'd be a little concerned that it would crack. Perhaps on a drill press with a piece of wood for backing. I have some plexiglass and several different size hole saws, I'll try cutting some Monday. Does agar require more air than would be in the jar? If not the hole could be easily closed with silicone. I'm just thinking that there would be less chance for contams if you could seal the center hole from the drill bit. This is getting interesting Bob |
| Posted by: Voodoo May 04 03, 11:18 AM GMT |
| Lexan is MUCH more durable and less prone to cracking than plexiglass. If your going to do it, you should spend the extra couple of bucks for lexan. .02 |
| Posted by: Molester May 04 03, 02:53 PM GMT | ||
I use a standard hole saw with no problems. |
| Posted by: Camelot May 08 03, 09:11 PM GMT |
| Thanks guys...glad the NeoMyc could contribute something useful. repo - the acrylic, although pretty tough as Mol indicated, is kind of brittle and could possibly crack when subjected to the hole saw. Get a "fine-tooth" hole saw and perhaps use the drill press (vice hand-held dirll) for stability and keeping the bit straight. I would also go a step further (bare in mind I'm pretty anal when constructing things Can't answer the agar question...not that advanced yet. (still working the cake tek One additional thing - rough cut your acrylic sheets before using the hole saw. That way if it does crack you don't risk the crack running the whole length of the sheet and ruining it. If you do get a crack, you can stop-drill it to keep it from going further=drill tiny hole at the end of the crack) The sheets I got at Lowe's are 18 x 24 x 3/32 and cost about $15/per. I estimate you can make about 18 caps per sheet...24 if you cut them real close together. Good luck bro! Cam |
| Posted by: repobob May 08 03, 10:24 PM GMT |
| Camelot, some great ideas. Sandwiching the glass between two boards should help alot. That will make it much easier. Thanks Nan, That is exactly what I was looking for. Tried plexiglass without success,even with a drill press on low speed. The sandwich idea may help, been to busy this week to look for lexan, hope to have some time this weekend. I really appreciate all the help on this, you guys are great. |
| Posted by: Molester May 12 03, 06:45 PM GMT |
| Extruded acrylic will melt in the PC. I thought I'd try printing on it so I cut up a bunch of slides from some scrap pieces. PCed them in a jar for 20 mins, they were all warped and stuck together. |